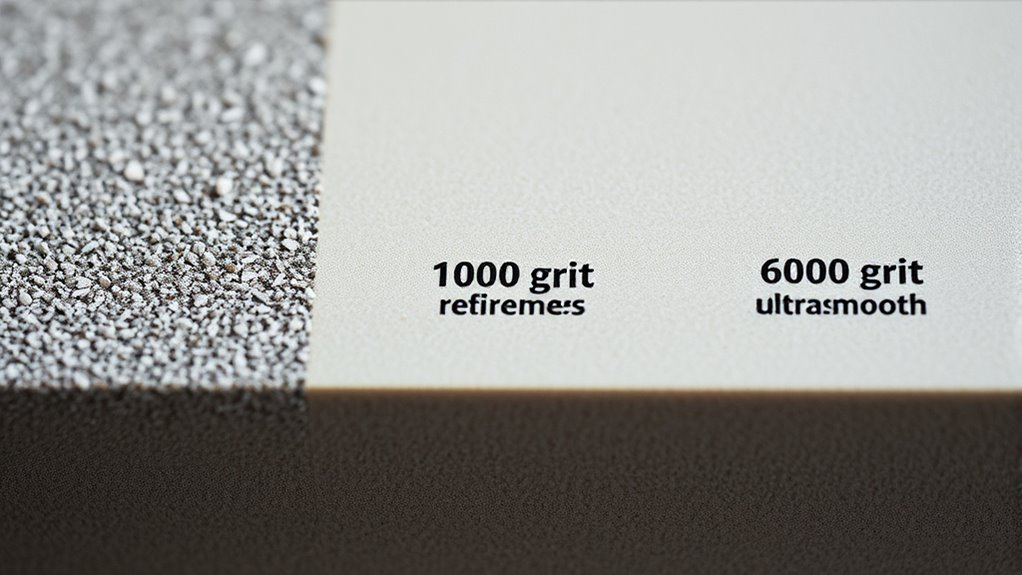
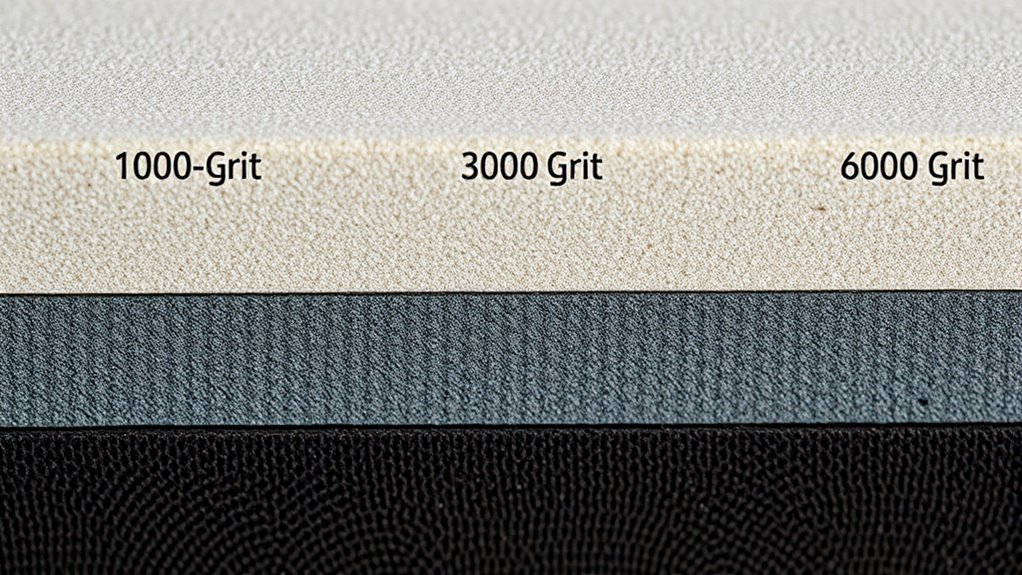
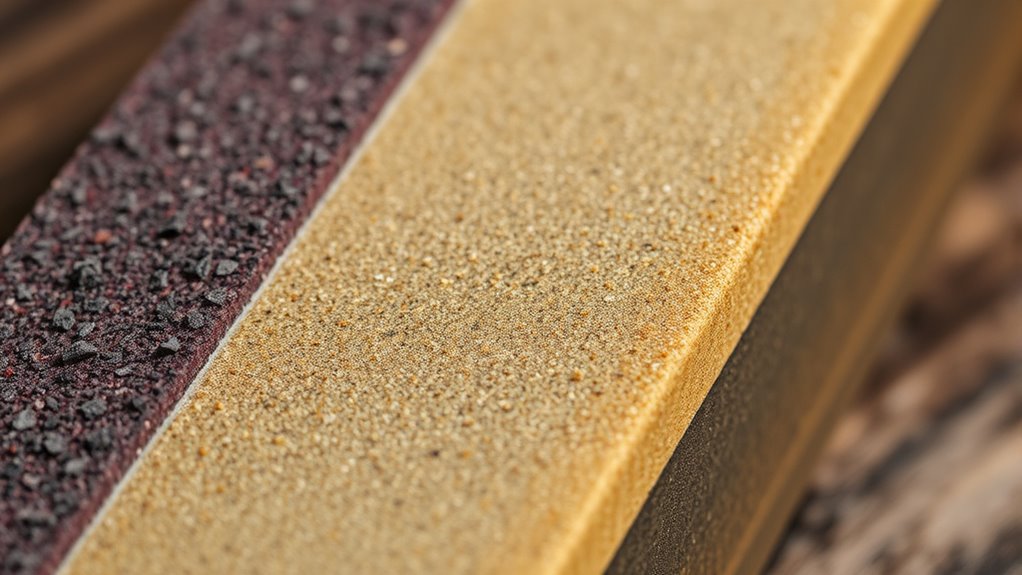
Whetstone grits like 1000, 3000, and 6000 serve different purposes in sharpening. The 1000 grit is coarse enough to shape blades, repair chips, and remove scratches. The 3000 grit refines and smooths the edge, preparing it for polishing. The 6000 grit is fine enough to polish and produce a razor-sharp, smooth edge. Understanding how each grit level works helps you get the best results—keep exploring to master their uses.
Key Takeaways
- 1000 grit is coarse enough to reshape blades, remove chips, and repair damage efficiently.
- 3000 grit refines the edge, improving sharpness and preparing it for polishing.
- 6000 grit is fine enough to polish and smooth the blade’s edge for a razor-sharp finish.
- Progressing from 1000 to 6000 grit ensures a balanced, durable, and ultra-sharp edge.
- Each grit stage serves a specific purpose: shaping, refining, or polishing the blade’s edge.

HOSHANHO Kitchen Knife in Japanese High Carbon Steel, Professional High-Class Chef's Knife 8 inch, Non-slip Ultra Sharp Cooking Knives with Ergonomic Handle
【High-End Japanese Steel Chef's Knife】 HOSHANHO chef's knife is made of Japanese high carbon steel 10Cr15CoMoV, 2x of...
As an affiliate, we earn on qualifying purchases.
Understanding Whetstone Grits and Their Numbering System

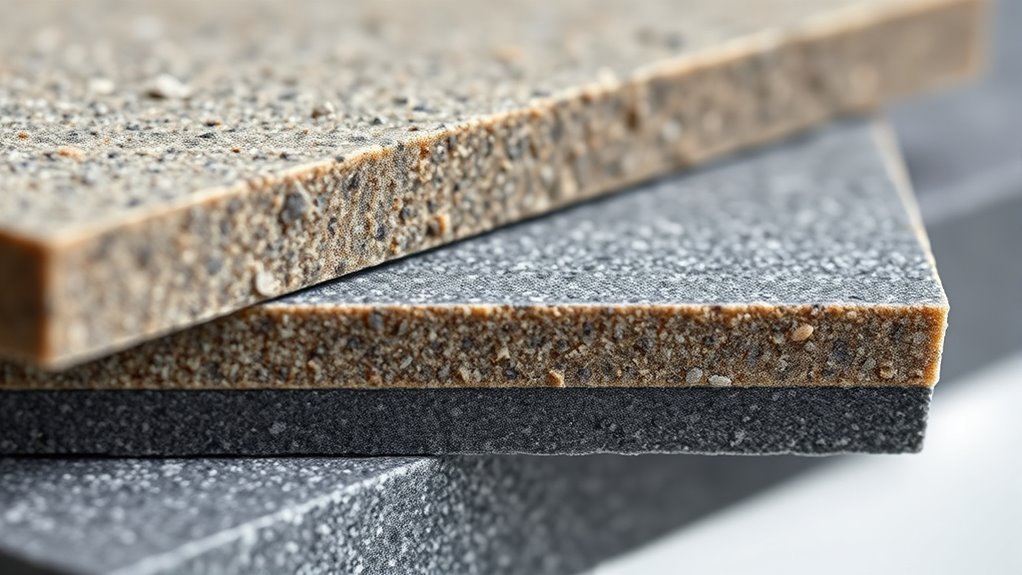
Whetstone grits are vital for determining how fine or coarse a sharpening stone is, and understanding their numbering system can seem confusing at first. Historically, grit numbering was based on the abrasive’s size, with larger numbers indicating finer particles. This historical grit numbering helps you grasp how abrasive particles are classified. When choosing a stone, grit size consistency is essential; uniform particles ensure an even, predictable sharpening process. Although modern grading systems have moved toward more standardized measurements, understanding the original grit numbering gives you insight into a stone’s roughness or fineness. Recognizing the classification of abrasive particles and maintaining grit size consistency, you can better select the right whetstone for your sharpening needs, guaranteeing optimal results and durable blades.

HENCKELS Statement Razor-Sharp 8-inch Chef Knife, German Engineered Informed by 100+ Years of Mastery, Black/Stainless Steel
ULTRA-SHARP BLADES: Superior professional-level sharpness that ensures precision cutting.
As an affiliate, we earn on qualifying purchases.
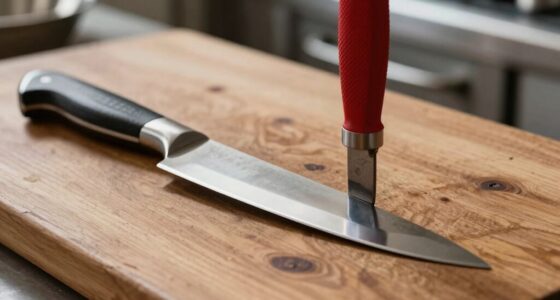
The Role of Coarse Grits in Shaping and Repairing Blades
Coarse grits are essential for removing deep scratches and restoring the overall shape of your blade. They quickly level uneven edges and fix damage, making your blade ready for finer work. Once rough shaping is complete, you can move on to polishing for a smooth finish. For a touch of flavor variety, some enthusiasts incorporate seasonal flavor blends to add unique character to their blades during the sharpening process. Proper use of abrasive materials ensures effective material removal and prolongs the life of your sharpening tools.
Removing Deep Scratches
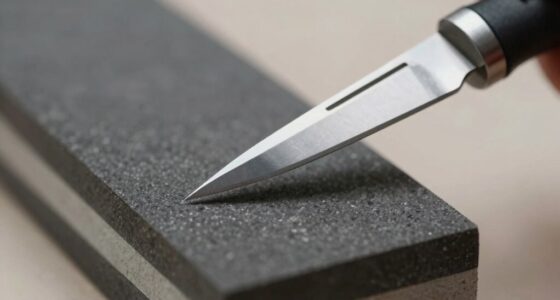
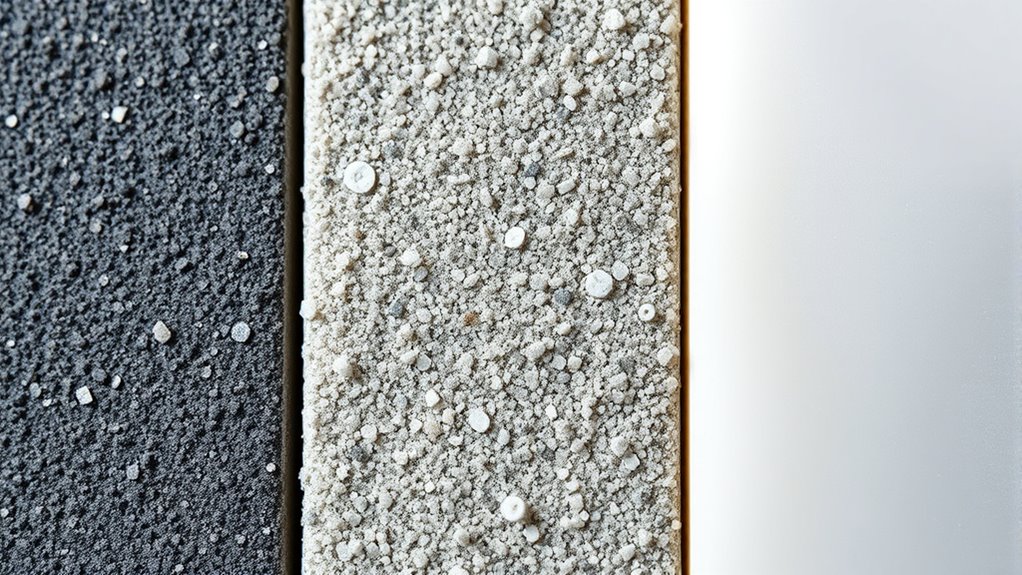
When removing deep scratches from your blade, coarse grits play a crucial role in shaping and repairing the edge. They efficiently grind down imperfections, setting a solid foundation for further refinement. You’ll often start with a grit like 1000 or even lower, especially if the scratches are severe. Diamond sharpening tools work well here, providing aggressive material removal. Once the deep damage is minimized, you can switch to finer grits for polishing. Ceramic honing can help smooth out the surface after coarse grinding, ensuring a clean, even edge. Use the following table to understand the different grit functions:
| Grit Type | Purpose |
|---|---|
| Coarse (1000) | Removing deep scratches |
| Medium | Shaping and repair |
| Fine | Refining the edge |
| Ultra-fine | Polishing and finishing |
| Ceramic | Smoothing after coarse grinding |
Additionally, understanding the contrast ratio of your projector can significantly influence the perceived sharpness and clarity of the images you view.
Restoring Blade Shape
After removing deep scratches, the next step is restoring the blade’s shape by focusing on coarse grit sharpening. Coarse grits quickly remove material, helping you reshape dull or deformed edges efficiently. This process enhances blade durability by repairing chips or bends that compromise its integrity. As you work with coarse grit, you reshape the bevel, ensuring the edge maintains proper geometry. A well-formed edge from this stage improves edge retention, allowing the blade to stay sharp longer during use. Be deliberate and steady, removing material evenly to avoid creating uneven spots that could weaken the blade. Proper tool maintenance during this step ensures consistent results and extends the lifespan of your blades. Once the shape is restored, you’ll be ready to move on to finer grits, but this initial step is vital for a strong, durable edge.
Preparing for Fine Polishing
Preparing for fine polishing begins with ensuring your blade’s shape and structure are solidly restored using coarse grits. This foundational step is vital for effective stone maintenance and optimal sharpening techniques. When you properly repair and shape your blade, you set the stage for a smooth, mirror-like finish. Skipping or rushing this step can result in uneven polishing and compromised sharpness. Focus on removing any nicks or imperfections, creating a consistent edge. Remember, coarse grits lay the groundwork for finer grits to work their magic. Approach this phase with patience and precision, knowing it’s essential for achieving a professional-quality finish. Proper preparation boosts your confidence and guarantees your blade performs at its peak after fine polishing.
- Feel the satisfaction of a perfectly restored edge
- Experience the pride of mastering sharpening techniques
- Enjoy the confidence of flawless, razor-sharp blades
WÜSTHOF 8" Gourmet Chef's Knife, Black
WÜSTHOF GOURMET SERIES – 8" Chef's Knife with synthetic polypropylene handles that resist fading, discoloration, heat and impact....
As an affiliate, we earn on qualifying purchases.
Medium Grits and Their Use in Refining Edges
Medium grits play a vital role in sharpening tools because they help refine the edge after initial shaping. They use abrasive particles bonded to the stone’s surface through metal bonding, which guarantees durability and effective material removal. This stage smooths out the roughness left by coarse grits and begins to bring the blade closer to a sharp edge. The abrasive particles are designed to remove small imperfections, straighten the edge, and improve cutting performance. By working with medium grits, you gradually shift from heavy material removal to finer refinement. This step is essential for preparing your blade for polishing, as it guarantees a more uniform, refined edge. Proper use of medium grits results in a sharper, more durable edge that’s ready for the final polishing stage. Additionally, understanding quality assessment helps ensure you’re using the appropriate grit for the task at hand. Recognizing the abrasive properties of different grits can further optimize your sharpening process and outcomes. Using a consistent exfoliation technique can also aid in achieving a smoother and more precise edge. Knowing how net worth influences a person’s career can also help in understanding their financial decisions and stability. Incorporating proper technique in your honing can also significantly impact the quality of your results.

Babish 8-Inch Chef Knife – High-Carbon German 1.4116 Steel Kitchen Knife – Professional Cutlery for Precise Slicing and Chopping
Forged from a single piece of high-carbon 1.4116 German steel
As an affiliate, we earn on qualifying purchases.
Fine Grits for Polishing and Achieving a Razor-Sharp Finish
Fine grits are essential for polishing your blade and achieving a razor-sharp finish. They smooth out tiny imperfections left by coarser stones, enhancing your edge’s sharpness and beauty. Using proper polishing techniques, you’ll notice a significant difference in how your blade performs—cutting effortlessly and with precision. Remember, honing isn’t just sharpening; it’s refining and maintaining your edge with fine grits. These grits, like 3000 and 6000, help you reach that mirror-like finish you desire. As you progress, you’ll feel the satisfaction of a truly refined edge.
- Experience the thrill of a perfectly polished blade that slices through with ease
- Feel confident knowing your knife is honed to razor-sharp perfection
- Enjoy the artistry of achieving a mirror finish that turns heads
How Grit Progression Affects Cutting Performance
Progressing through different grit levels directly impacts how well your blade cuts. As you move from lower to higher grits, the abrasive particle size decreases, creating a finer surface on the stone. This refinement reduces the roughness of the edge and improves cutting efficiency. Coarser grits remove material quickly but leave a rougher edge, while finer grits refine the edge for smoother, more precise cuts. Each stage of grit progression prepares the blade for the next, gradually enhancing performance. Skipping steps or rushing through the process can result in a less effective edge, decreasing cutting efficiency. By understanding how grit progression shapes abrasive particle size, you guarantee your blade reaches ideal sharpness and maintains excellent cutting performance over time.
Choosing the Right Grit for Your Specific Needs
Choosing the right grit depends on your specific sharpening goals and the condition of your blade. If your blade is dull or damaged, start with a lower grit to remove metal efficiently. For finer honing and polishing, higher grits like 3000 or 6000 are ideal. Metal hardness influences your choice; softer steel benefits from coarser grits, while harder steel requires finer stones to avoid unnecessary material removal. Your sharpening techniques also matter—more aggressive strokes work better with lower grits, while gentle, precise movements suit higher grits. Additionally, understanding the grit progression can help you achieve the best results with less effort. Recognizing the importance of material removal can guide you in selecting the appropriate grit for your task, ensuring efficient and effective sharpening.
Tips for Using Whetstones Effectively at Different Grit Levels
Using whetstones effectively across different grit levels requires understanding how each stage contributes to your sharpening process. For coarse grits like 1000, focus on removing chips and reshaping the blade, so use steady, even strokes. Medium grits like 3000 refine the edge, so pay attention to consistent pressure and angle. Fine grits such as 6000 are for polishing, so gentle strokes help achieve a smooth finish. Always follow safety precautions, like keeping fingers clear of the blade’s path and maintaining a stable work surface. When not in use, store your whetstones in proper storage solutions to prevent damage and contamination. Proper storage and safety practices ensure that your sharpening process remains efficient and injury-free, helping your knives stay sharp longer. Additionally, understanding the role of AI-powered virtual reality in e-learning can enhance your knowledge of innovative training techniques for maintaining safety during sharpening. Incorporating advanced sharpening tools can also improve precision and reduce the risk of accidents during the process. Being aware of proper technique is crucial for achieving optimal results and avoiding injury. Exploring ergonomic tool design can further assist in reducing fatigue and improving control during your sharpening routine.
Frequently Asked Questions
Can I Use Higher Grit Stones for All Sharpening Tasks?
You can use higher grit stones for all sharpening tasks, but it might not be ideal. Higher grit stones, like 6000, excel at polishing and refining edges, enhancing sharpening efficiency. However, they may not be suitable for initial shaping or repairing dull blades, as grit compatibility matters. For best results, combine lower and higher grit stones, ensuring you sharpen efficiently and achieve a fine, precise edge.
How Do I Clean and Maintain Different Grit Whetstones?
To keep your whetstones sharp and ready, you need to clean and maintain them properly. After use, rinse the stone with water and gently scrub with a soft brush—don’t forget to dry it thoroughly. Store your stones flat or upright in a dry, safe spot, and occasionally apply honing oil to keep the surface smooth. Proper stone storage and cleaning make certain your sharpening tools stay effective, sharp, and long-lasting.
Are Synthetic or Natural Whetstones Better for Specific Grits?
You’ll find synthetic whetstones better for consistent grit, making your sharpening process more predictable. Natural stones, however, often have variable grit consistency, which can be beneficial for polishing or refining edges. If you want precision, go synthetic, especially at specific grits like 1000 or 3000. Natural stones excel for finishing touches, providing a smoother, more refined edge. Choose based on your sharpening needs and the consistency you prefer.
What Safety Precautions Should I Take When Sharpening With High Grits?
Imagine delicate sparks dancing as you sharpen—protect your eyes with safety glasses to guard against tiny, airborne particles. Guarantee proper ventilation to clear any dust or fumes, creating a safe workspace. Keep your hands steady and avoid rushing, stopping if debris accumulates. By wearing safety glasses and maintaining good airflow, you shield yourself from potential hazards, making your high-grit sharpening both safe and precise.
How Long Does It Typically Take to Sharpen a Blade at Various Grit Levels?
Sharpening speed varies with grit levels and your technique. At lower grits like 1000, it might take 5-10 minutes to remove rough edges, while higher grits like 3000 and 6000 can take an additional 10-20 minutes each to refine and polish. A good grit progression guarantees efficiency; start with a coarser grit to reshape, then move to finer grits for a sharper, smoother edge.
Conclusion
Ultimately, selecting the right grit is about gently guiding your blade toward its best self. By understanding how each number softly shapes and polishes, you can craft a tool that performs seamlessly. With patience and a keen eye, you’ll find that every step on the whetstone subtly elevates your craftsmanship, turning routine maintenance into a refined art. Embrace the journey, and let your blades whisper tales of precision and care.