Start by choosing ripe, firm tomatoes with vibrant color. Score a small X on the bottom and blanch them in boiling water for about 30 seconds. Transfer to an ice bath to loosen the skins. Gently peel away the skins and use a small spoon or your fingers to carefully scoop out the seeds, avoiding mess. Proper technique makes seed removal quick and clean. Keep going to discover more tips for perfectly prepping tomatoes for your sauce.
Key Takeaways
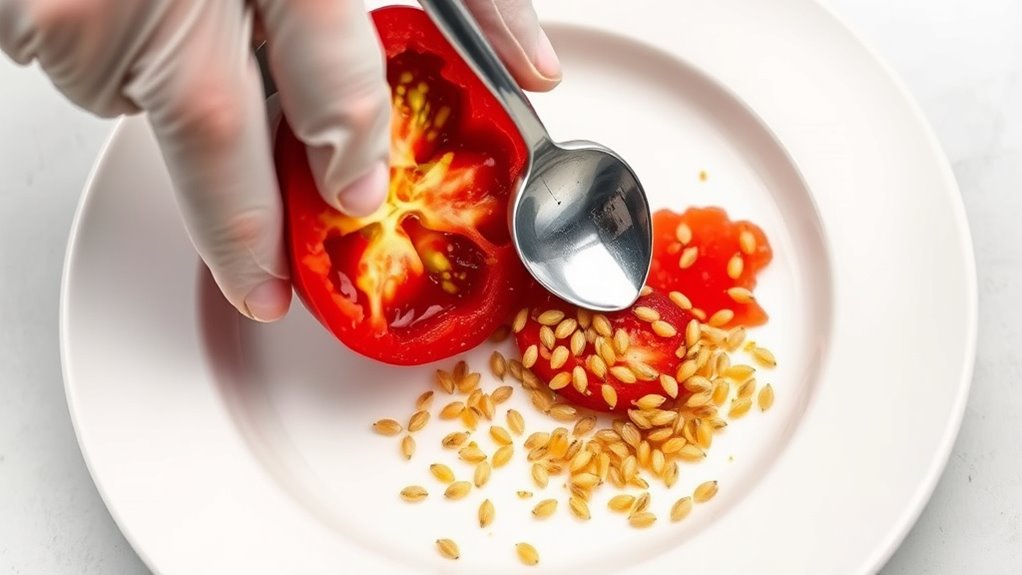
- Use a small spoon or your fingers to gently scoop out seeds and gel from the tomato cavity.
- Peel tomatoes after blanching to access the inner flesh easily and reduce mess.
- Score a small “X” on the bottom before blanching for quick skin removal and cleaner seed extraction.
- Work over a bowl or sink to catch seeds and juice, minimizing spills and mess.
- Handle tomatoes gently to prevent tearing and spreading seeds, ensuring a tidy seed removal process.
Making a flavorful tomato sauce starts with properly prepping your tomatoes. To achieve the best taste and texture, you need to understand the process of tomato ripening and how to handle your produce efficiently. Ripe tomatoes are essential because they develop the sweetness and acidity that give your sauce its depth. When selecting your tomatoes, look for ones that are fully ripe, with vibrant color and firm flesh. If your tomatoes are underripe, they may lack the flavor you’re aiming for, so it’s worth waiting until they reach that perfect ripeness. Proper ripening guarantees that your sauce will be rich and balanced, saving you time and effort in the kitchen.
Ripe tomatoes with vibrant color and firm flesh are key to a rich, flavorful sauce.
Once your tomatoes are ripe, the next step is to prep them using the right kitchen tools. You’ll want a sharp paring knife, a cutting board, and ideally, a blanching setup—boiling water and an ice bath. These tools make the process more efficient and less messy. First, score the tomatoes with a small “X” on the bottom, which helps in peeling later. Blanch the tomatoes by dropping them into boiling water for about 30 seconds to 1 minute, or until the skin starts to loosen. Using a slotted spoon, transfer the tomatoes immediately into an ice bath to halt the cooking process. This step guarantees the skins loosen easily without overcooking the flesh, preserving flavor and texture.
With the tomatoes cooled, you can peel them using your fingers or a small knife, starting at the scored “X.” The skins should come off quickly and cleanly, thanks to the blanching. Now, it’s time for seed removal, which is vital for a smooth sauce. Using a small spoon or your fingers, gently scoop out the seeds and the surrounding gel. This step prevents bitterness and excess moisture, which can thin out your sauce. Be careful to keep the flesh intact as much as possible, so you don’t waste the flavorful pulp. Proper kitchen tools also help maintain the color accuracy of your tomatoes, ensuring a vibrant and appealing final product. Handling your tomatoes with the right tools and techniques guarantees you get perfectly prepared fruit for your sauce. Tomato ripening guides your selection, while kitchen tools streamline peeling and seed removal. Taking these steps not only improves the flavor and consistency of your sauce but also makes the entire process more efficient and less messy. With a little patience and the right tools, you can turn fresh, ripe tomatoes into a rich, homemade sauce that’s full of flavor and free from any unnecessary seeds or skins.
Frequently Asked Questions
Can I Seed Tomatoes Without Removing the Skins?
Yes, you can seed tomatoes without removing the skins. To do this, you might cut a small X at the bottom and blanch them briefly, then gently squeeze out the seeds, maintaining the tomato’s skin and flavor. This method preserves the tomato’s natural flavor and seed consistency, making your sauce richer. Just be careful, as the seeds can be slippery, but it keeps the skins intact for a smoother process.
What Tools Are Best for Seed Removal?
Did you know that nearly 80% of tomato flavor comes from the seeds and surrounding gel? To efficiently remove seeds, use a small spoon or a tomato corer. These tools allow you to carefully extract seeds with minimal mess, preserving the tomato’s flavor. Seed extraction techniques like gentle scooping or using a serrated spoon help you control the process, resulting in smoother sauce and better-tasting tomatoes.
How Do I Prevent Seeds From Spilling During Prep?
To prevent seed spillage and mess during tomato prep, hold the tomato steady over a bowl or sink, and use a small spoon or your fingers to gently scoop out the seeds. Work slowly and carefully to avoid squeezing the tomato too hard, which can cause seeds to spill. Keep a damp cloth nearby to quickly wipe away any drips, ensuring mess prevention and a clean workspace.
Is Seed Removal Necessary for All Tomato Types?
You know what they say, “Every tomato has its own story.” Not all tomato varieties require seed removal, so consider your sauce’s texture and flavor. For smoother sauces, use seed removal techniques on larger, seed-filled tomatoes like beefsteaks. Smaller or cherry tomatoes often don’t need seed removal, making your prep quicker. Adjust your approach based on tomato variety considerations to achieve the best flavor and consistency.
How Long Does the Seed Removal Process Take?
The seed removal process usually takes about 5 to 10 minutes, depending on your seed removal techniques. Once you start, you’ll find that the timing of seed extraction is quick if you use efficient methods like scooping or squeezing tomatoes, then straining or removing seeds with a spoon. Be patient, and you’ll have your seeds out in no time, making your sauce smoother and less messy.
Conclusion
Now that you’ve mastered the art of seed removal, imagine the possibilities ahead. Your perfectly prepped tomatoes hold the key to a rich, flavorful sauce—just waiting for your touch. But here’s the secret: the real magic isn’t just in the prep, it’s in what you create with them. Are you ready to open that potential? The next step could transform your cooking—and maybe even yourself. The choice is yours.